Create a car stopping window box display
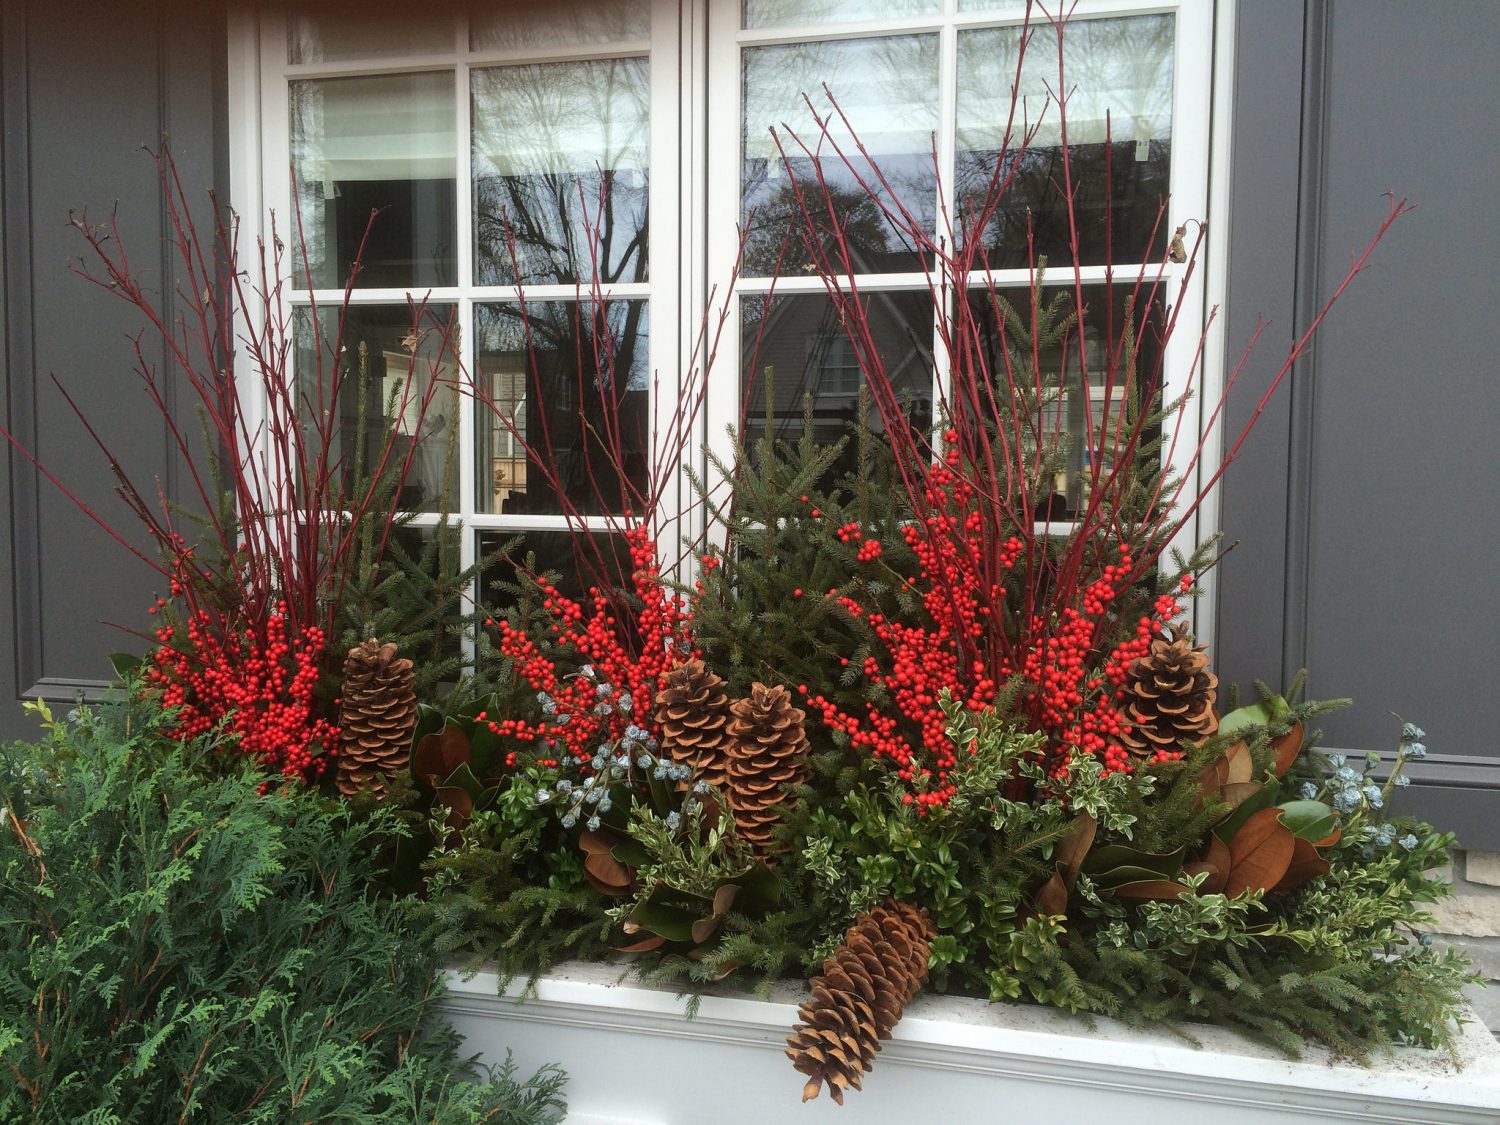
This 4 foot window box is loaded to the MAX with some great color and essential greens. You can always choose go more basic with your design by leaving out the colored berries, but if you want to take it to the next level, ADD AWAY!
-Start with the basic shape by adding in 20 small TREE TOP Stems (shake your stems to give them some fullness). TIP: Don’t make a straight level of greenery, but instead make a dominate peak that will be the focal point for your arrangement (and a lesser secondary peak as shown above, if your window box is large).
-Fill around the edge of the container with short stems of the tree tops that you are not using, or use the cut leftovers from shortening your tree top. (Always use all your scraps.)
-Add BOXWOOD as a filler layer between the tall tops and the edge of the container. This will give the window box body if the tree tops are not very bushy.
-MAGNOLIA will join the Boxwood in that mid layer. Shake your stems so that the magnolia isn’t flat, but has some fullness.
-Insert a bundle of DOGWOOD at each Peak, the primary and the secondary, we added a few pieces in the middle to accompany a small berry corsage.
-We used SUGAR CONES, two together and three individual. The double pair are in the middle to give the window box a solid foundation. Cones usually fit well in gaps in the greenery. TIP: Tuck the bottoms of the cones into the greens so that they don’t look floaty.
-Finally, add BERRIES (we used winterberry and blue eucalyptus pods). The majority of the berries should be a part of the primary and secondary peak. (We made a third, small corsage in the middle because of the length of the box.)
Tree Tops- 20 Stems
Boxwood- 3 Bunches
Red Twig Dogwood- 2 Bunches
Magnolia- 2 Bunches
Sugar Cones- 5 Cones
WinterBerry- 3 Med Bunches
Eucalyptus Pods- 1 Bunch


